Hello everyone :)
It’s me again and I’m still full of energy today so I decided to prepare a short tutorial for you on how to make quilled roses.
I know that most of you are probably advanced quillers, but I bet there are also those among you who have just begun their adventure with quilling. So I guess this tutorial is for you guys. :)
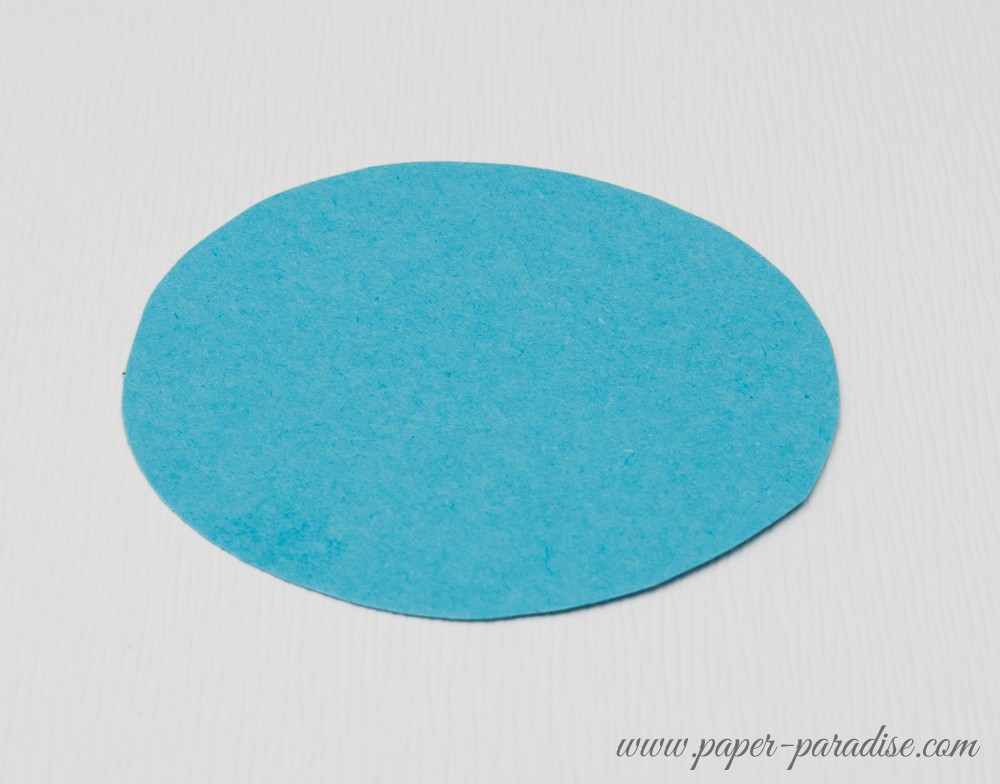
Step 1: Draw a circle. You can use a pair of compasses to do that or just like me – a glass.

Step 2: Cut out the circle.
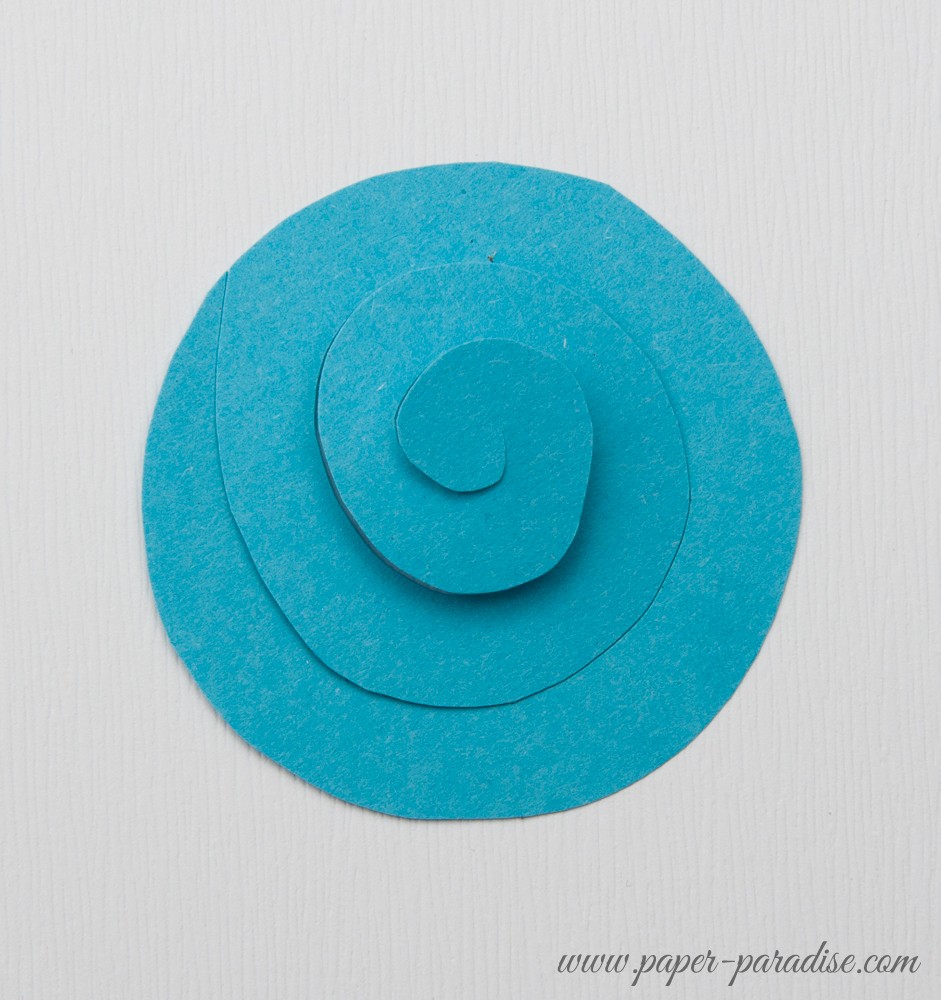
Step 3: Now you need to cut out this spiral shape that you can see below. It looks just like a shell of a snail. :)
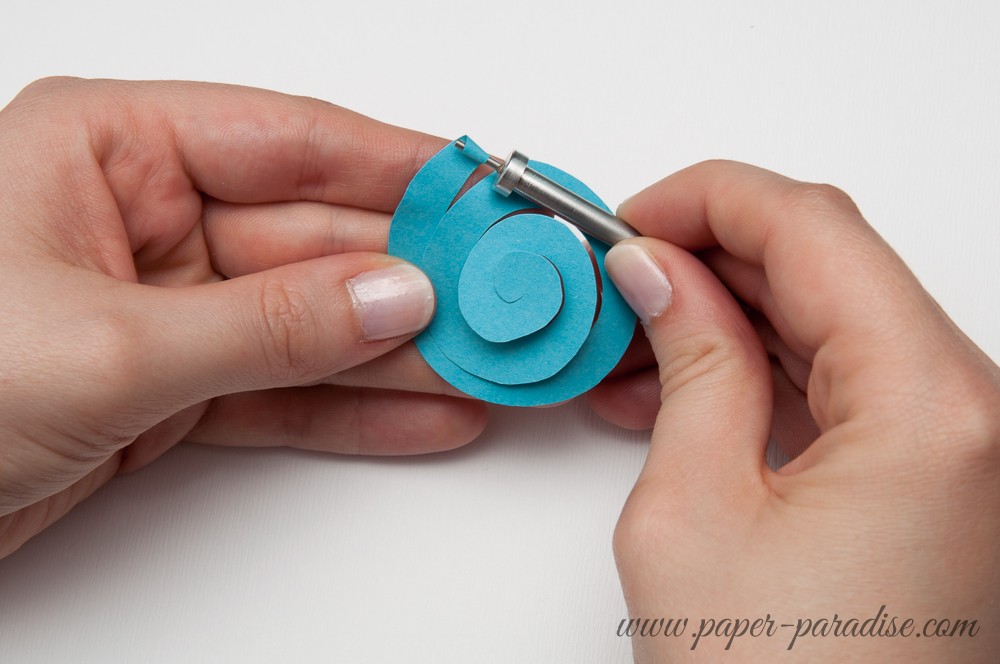
Step 4: Now it’s time to use your quilling tool. Just wrap the spiral around the quilling tool.
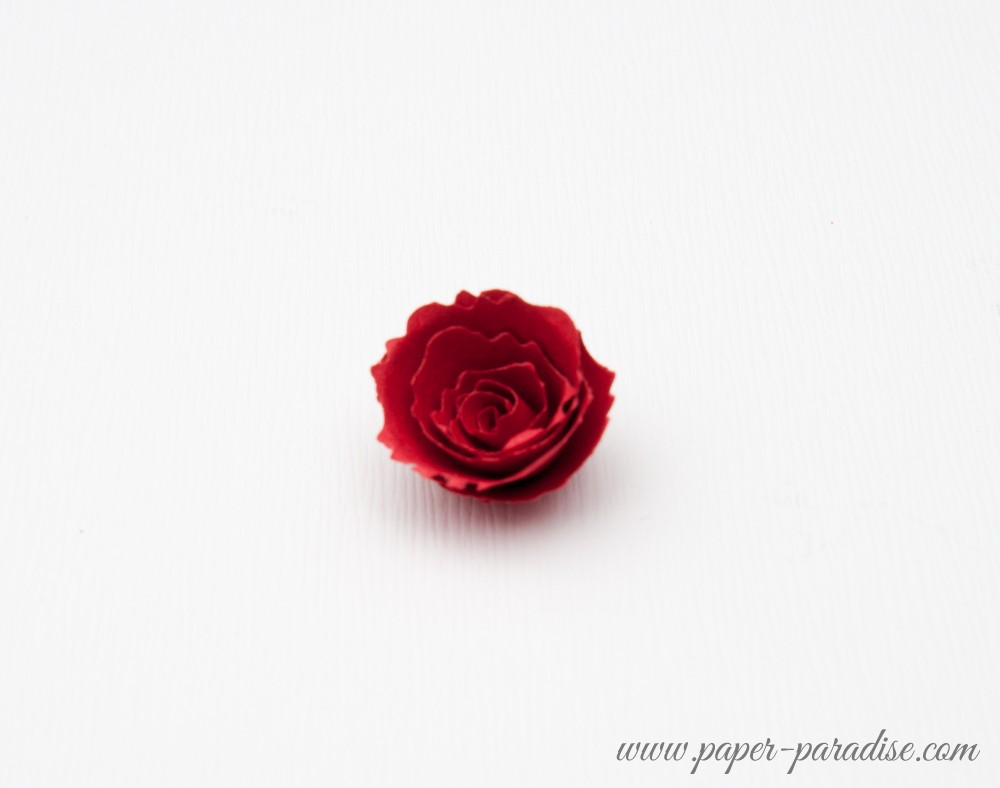
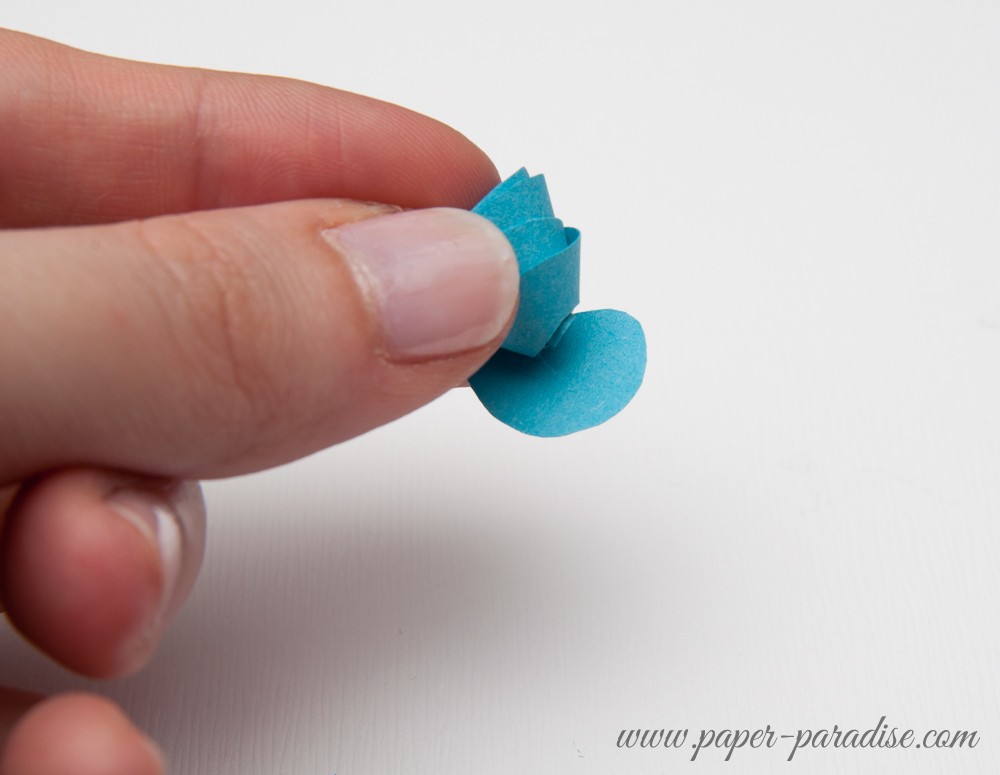
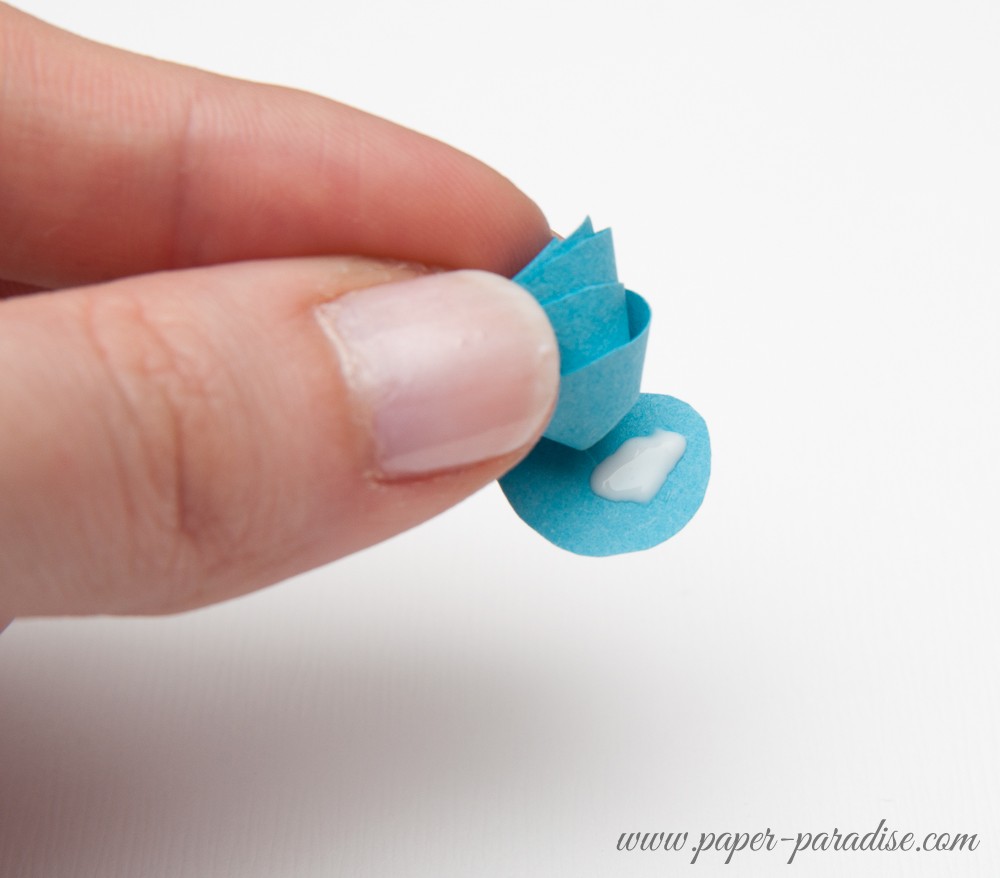
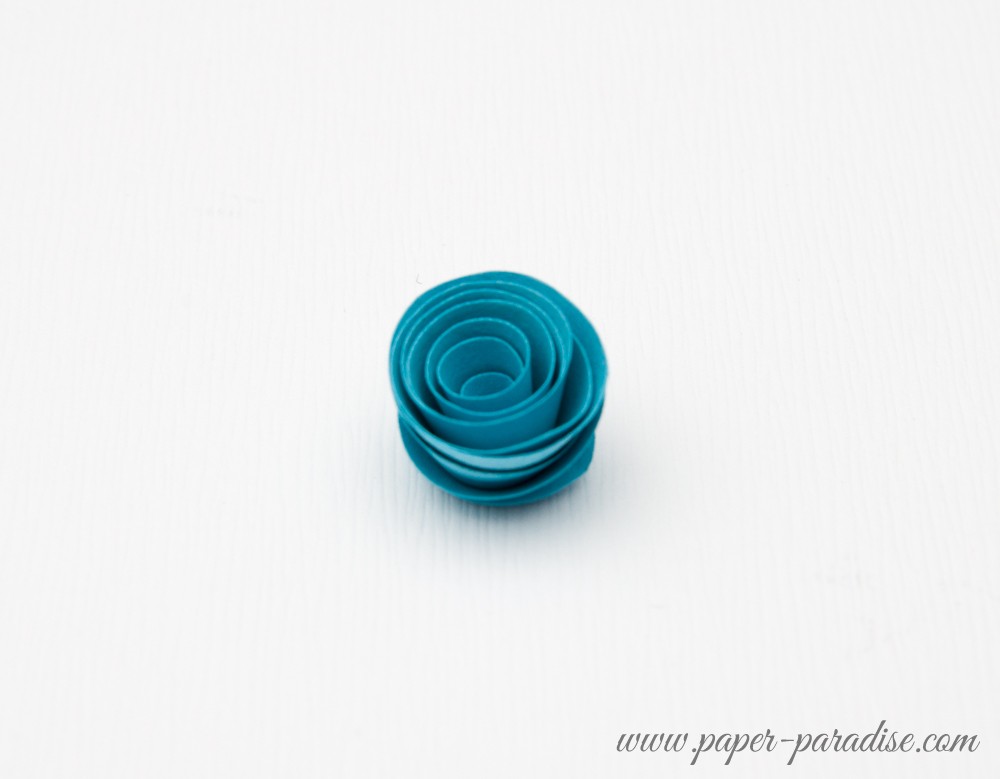
Step 5: Put some glue at the end. Glue the rose to its end and hold it like that for a moment so the glue will dry a bit. Done! Your rose is ready! :)
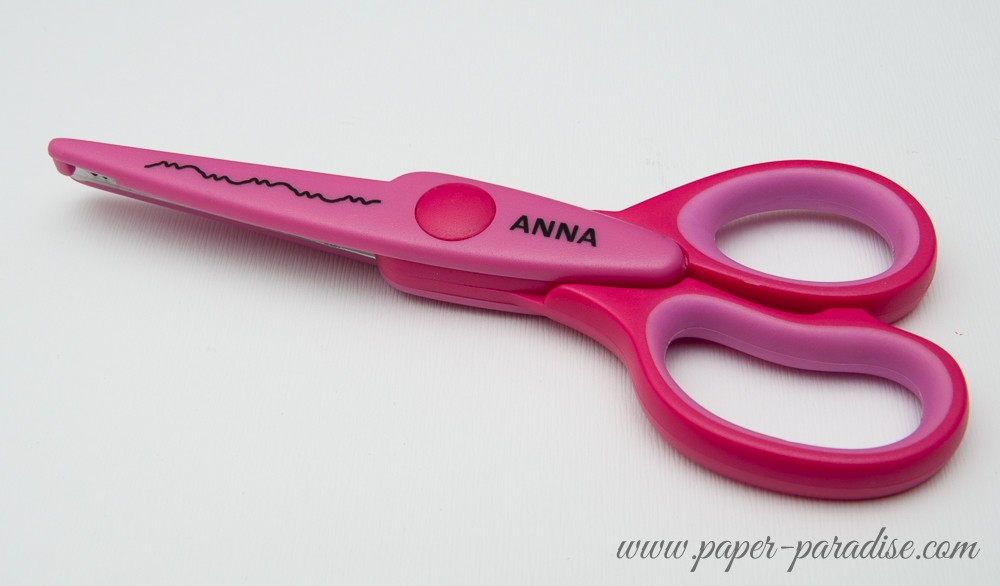
If you want to make the roses a bit more unique and interesting, you can use decorative scissors instead of the regular ones. :)